 Pin it
 On the morning before my cousin’s graduation party, my kitchen turned into an assembly line of cheerful chaos: clouds of flour, globs of soft butter, and the persistent hush of focus as I traced wobbly cap outlines in dough. I never thought a handful of ingredients could look so celebratory. There's a special satisfaction in crafting cookies that are both a treat and a tribute—especially when you’re dusting each diploma ribbon with a bold hint of gold.
Last summer, after the cake was cut and confetti settled, my niece snuck her sixth diploma cookie and flashed a sugar-dusted grin, pronouncing it her new lucky charm for ‘all grown-up occasions.’ I still remember her adding extra swirls to her own batch, determined that no two diplomas should march in straight lines. That moment is why, every June, I willingly hunt down edible gold dust even if it means an extra errand.
Ingredients
- All-purpose flour: Sifting before measuring makes the dough light, ensuring crisp yet tender cookies every time.
- Unsalted butter: Room temperature butter creams easily, and using unsalted lets you control the subtle depth of the dough's flavor.
- Granulated sugar: The key to even sweetness and those lightly browned edges you want in a good sugar cookie.
- Large egg: Gives the dough its structure, so your cookies hold their celebratory shapes.
- Pure vanilla extract: A dose of vanilla rounds out both the cookie and icing flavors—I always reach for the real thing.
- Almond extract (optional): Just a dash, but it’s what makes people pause and ask for the recipe.
- Salt: Balances the sweet and brings the subtle flavors into focus.
- Powdered sugar: Sifted for a flawless royal icing that pipes smooth lines and dries to a pretty sheen.
- Egg whites or meringue powder: For that glossy, foolproof icing—meringue powder swaps in well if you’re a little nervous about raw eggs.
- Cream of tartar: Stabilizes your icing so the caps and ribbons hold their crisp, modern edges.
- Black gel food coloring: A small squeeze gives you rich, true black without thinning the icing.
- Gold edible luster dust + clear alcohol or lemon extract: Nothing says celebration like actual gold highlights, and a little goes a long way.
Tired of Takeout? 🥡
Get 10 meals you can make faster than delivery arrives. Seriously.
One email. No spam. Unsubscribe anytime.
Instructions
- Cream and whip the base:
- Using an electric mixer, blend butter and sugar together until the mix is soft and almost fluffy. Add your egg, vanilla, and almond extract—the dough will smell inviting and promise good things.
- Form and chill the dough:
- Stir in flour and salt until just combined and gently knead into two discs. Wrap and chill for 45 minutes, letting the dough rest so your cookies won’t lose their crisp shapes.
- Roll, cut, and bake:
- On a lightly floured counter, roll dough to 1/4-inch thick, then cut as many caps and diplomas as you can fit. Place on parchment-lined sheets and bake at 350 F for 8–10 minutes, pulling them out right as the edges blush gold.
- Cool the cookies:
- Transfer to wire racks while the kitchen fills with a sweet, buttery aroma. This is your chance to sneak a plain one—quality control is part of the job.
- Prepare the royal icing:
- Beat egg whites (or meringue powder plus water) until frothy, sifting in powdered sugar and cream of tartar until the icing is glossy and stiff. Stir in vanilla for fragrance and divide among bowls—tint what you need black for hats, keep some white, and reserve the rest for gold.
- Decorate your masterpiece:
- Pipe outlines, then flood each section, swirling on diplo-ma scrolls and cap details as your imagination sees fit. Let cookies dry at least an hour; the icing will set crisp but not crack.
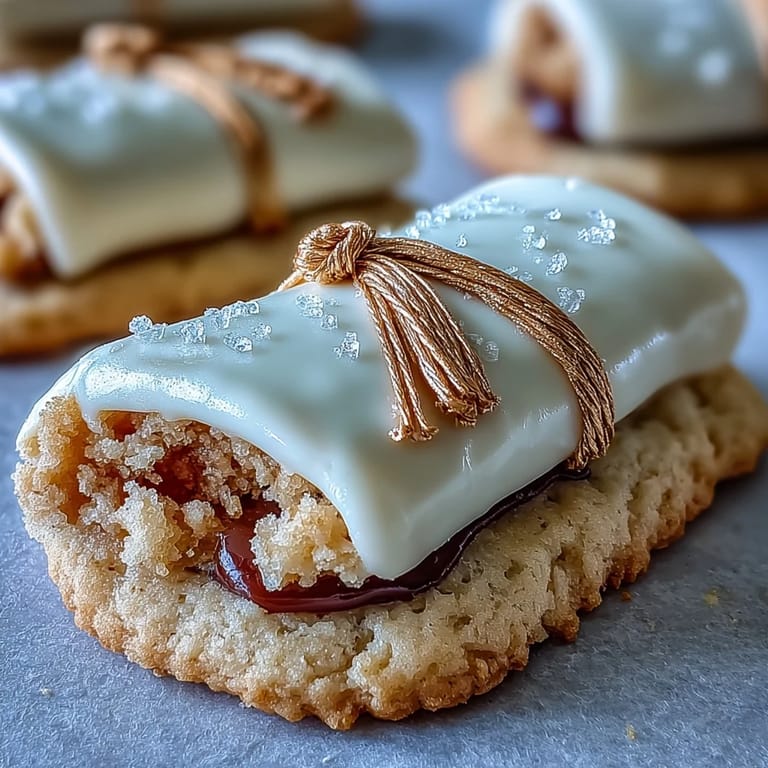
- Add the gold finish:
- Mix luster dust with a few drops of alcohol or lemon extract, then detail tassels and ribbons with a fine brush. The gold dries almost instantly, transforming every shape into a little edible trophy.
 Pin it
  Pin it
 The best moment wasn’t the applause at the table, but my dad sneaking a cap cookie in the kitchen after midnight, declaring it was the only one ‘properly frosted.’ In that quiet bite, these became more celebration than snack.
Making Decorating a Group Activity
Turning cookie decorating into an event is half the fun: bowls of black, white, and gold icing set out, a jumble of piping bags, everyone reaching for the same handful of cookies to add their own flourish. The mix of wonky tassels and bold, glittered diplomas only made the platter look more joyful in the end.
Storing and Saving Your Creations
Once fully dried, these cookies hold up beautifully for days—simply stack between sheets of parchment in an airtight tin. The gold details stay luminous, so they’re perfect for gifting or bringing to the celebration without any last-minute stress.
Tips for a Professional Finish (Even If You’re New to Royal Icing)
Steady hands help, but don’t stress if lines are slightly uneven; a dusting of gold luster covers a multitude of wobbles. I’ve also learned that using smaller piping tips gives more control—especially for sharp cap peaks or delicate diploma ribbons.
- Keep extra icing thick for outlining so it doesn't run.
- If colors seem dull, they brighten as the icing dries.
- Letting each color set before adding details keeps them crisp and clean.
 Pin it
 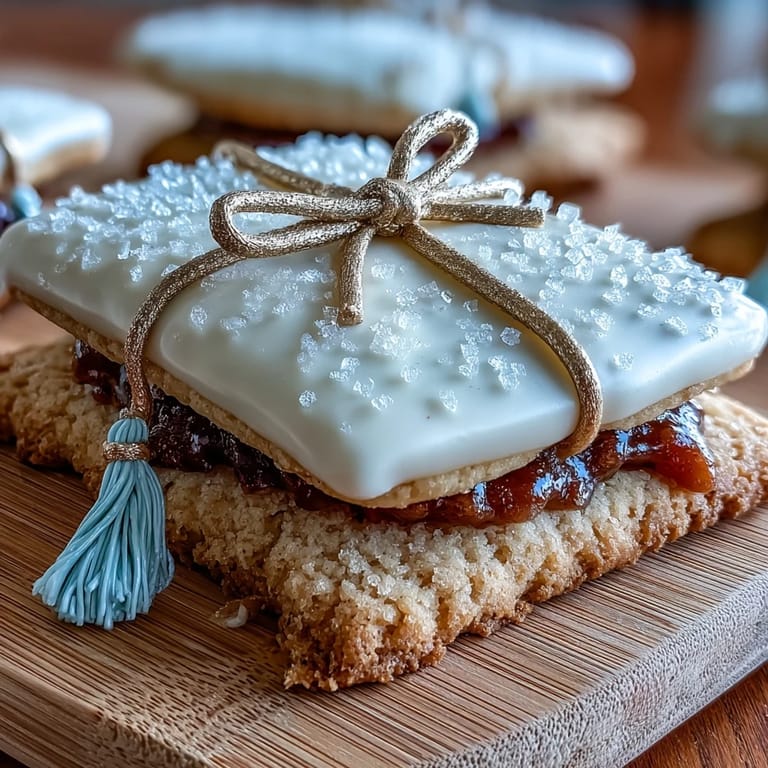 Pin it
 May each graduation cookie be both a toast and a treat! Here’s to every sweet milestone, big and small.
Recipe Q&A
- → How do I get a smooth flood with royal icing?
Start with an outline of thicker icing to form a dam, then fill with slightly thinner flooding consistency. Use a toothpick to coax air bubbles to the surface and let the icing level itself before setting.
- → Can I substitute meringue powder for raw egg whites?
Yes. Use 4 tablespoons meringue powder plus 6 tablespoons water to replace two egg whites. It provides stability and is a safer option for longer decor sessions.
- → What’s the best way to achieve a deep black for caps?
Use concentrated gel or paste black color and add it gradually to a white base; let the tinted batch sit a short while for the pigment to develop before adjusting to avoid over-thinning the icing.
- → How do I apply the gold luster for bright accents?
Mix edible gold luster dust with a few drops of clear alcohol or lemon extract to form a paint. Use a fine food-safe brush to add highlights to tassels and ribbons after the icing has crusted.
- → How long should decorated cookies dry before packing?
Let royal-iced cookies set at least 1–2 hours for light handling and up to overnight for full hardening before stacking or packing to avoid smudging.
- → Can I make the dough ahead of time?
Yes. Dough can be wrapped and refrigerated up to 48 hours or frozen for longer storage. Thaw and chill before rolling for best handling.